How to Take a Good Photo for Face Shape Analysis
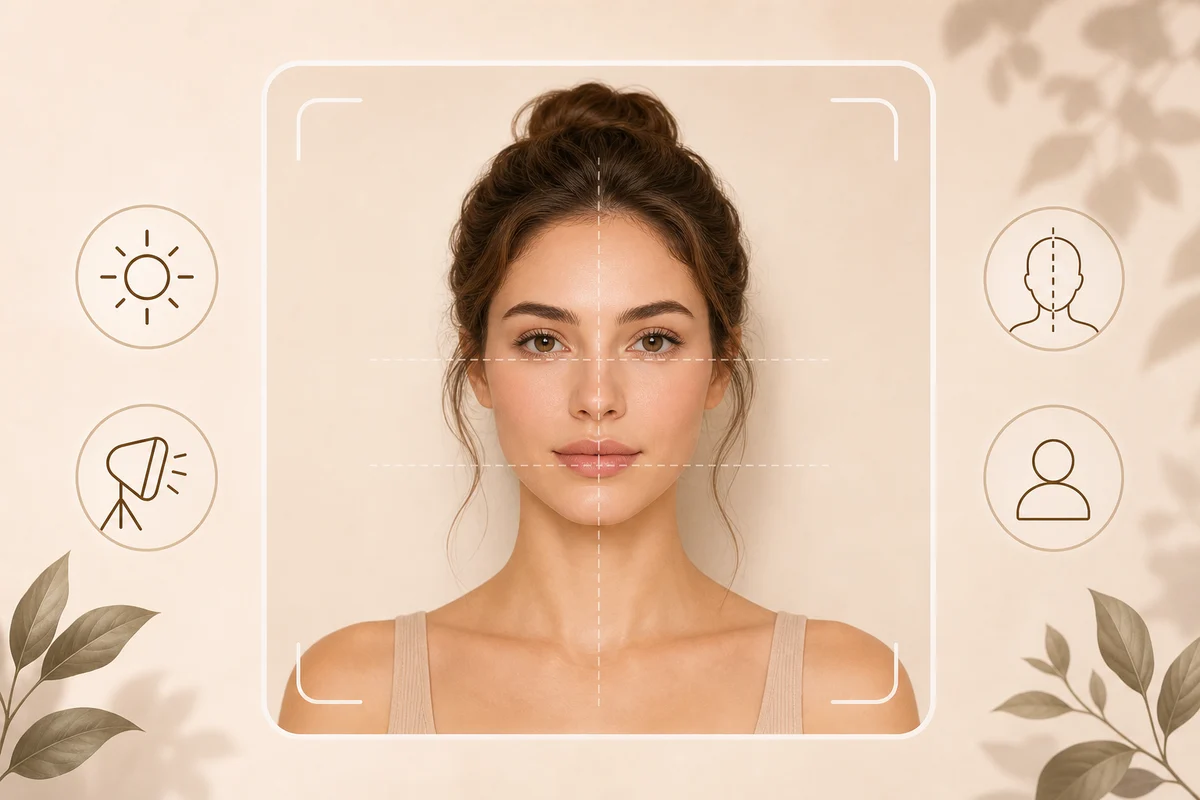
When a face-shape result feels wrong, review the photo first. FaceFit can only compare the features that are visible. A high camera angle, close lens, hidden jawline, strong filter, or uneven light can change the apparent proportions before analysis begins.
You do not need a studio photo. You need one clear, front-facing image that shows the forehead area, cheekbones, jawline, and chin without strong distortion.
Quick answer
Use soft, even light. Hold the camera at eye level and about an arm's length away. Face the lens directly with a relaxed expression. Keep one person in the frame, show the full face, move hair away from the jaw, and remove sunglasses or heavy filters.
A good photo does not guarantee a perfect label. It gives the Personal Face Shape Style Report a consistent view of the features behind the result.
A good analysis photo at a glance
| Check | Better input | Why it matters |
|---|---|---|
| Angle | Head upright, camera at eye level | Keeps left and right widths comparable |
| Distance | Arm's length, then crop if needed | Reduces close-lens distortion |
| Light | Soft light from the front | Reveals both cheek and jaw edges |
| Visibility | Hairline area, cheeks, jaw, and chin visible | Preserves the outline used for comparison |
| Expression | Relaxed mouth and jaw | Avoids temporary cheek widening |
| Quality | Sharp enough to see the face boundary | Prevents blur from hiding structure |
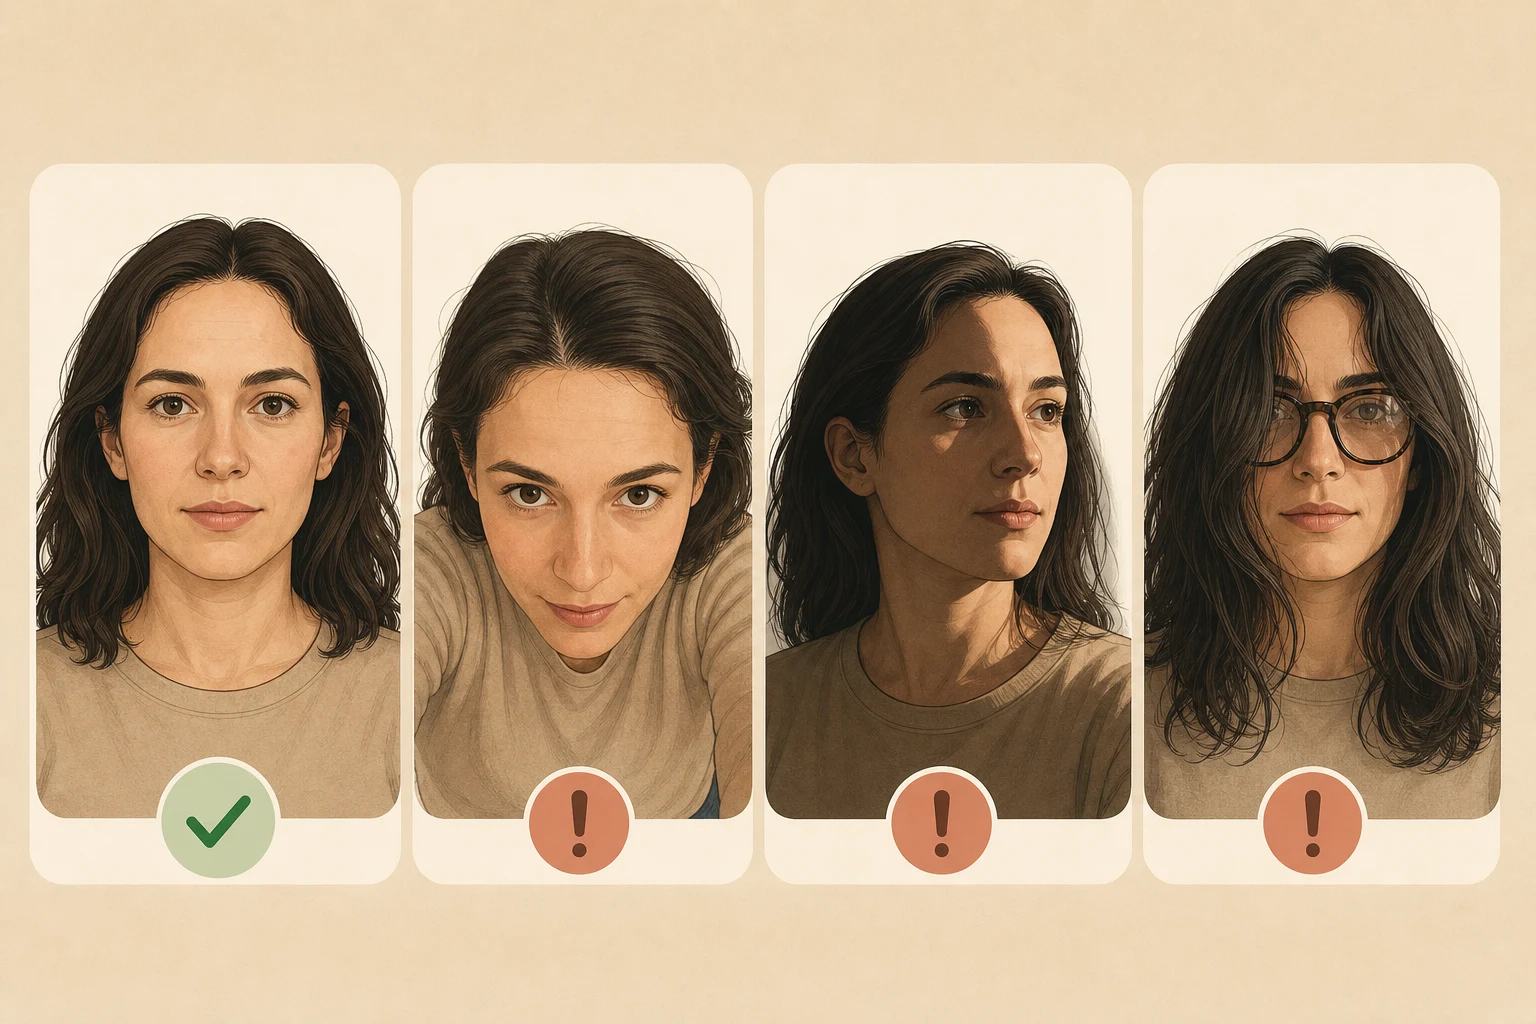
Camera angle can change the apparent face shape
A high camera angle makes the upper face closer to the lens and the jaw farther away. The face can look longer or more tapered. A low angle can make the jaw look broader. A turned head can enlarge one cheek and hide the far jaw edge.
For the analysis photo:
- Keep the camera near eye height.
- Point the nose toward the lens.
- Keep the chin neutral, not lifted or tucked.
- Check that both sides of the jaw are visible.
A mirror selfie can work, but it is easier to introduce side angle. A direct camera photo is usually cleaner.
Distance matters as much as angle
Very close phone cameras exaggerate the parts of the face nearest the lens. The center of the face can look wider while the ears and outer jaw recede. That changes the relationship between cheeks, jaw, and face length.
Move the camera farther away and crop normally instead of pushing the lens close to the face. Around an arm's length is a practical starting point. A modest crop is fine as long as the full face remains sharp.
Light should reveal both sides of the face
Soft frontal light keeps the boundary of both cheeks and both sides of the jaw visible. A window in front of you often works. If light comes from one side, rotate until the face is more evenly lit.
Avoid backlight, harsh side light, patterned shadows, colored light, and beauty filters. The background does not need to be white. It only needs enough contrast for the face and hair outline to remain readable.
Forehead, cheekbones, jawline, and chin must be readable
FaceFit does not need every strand of hair removed from the forehead. It does need enough of the upper-face boundary to compare width. Heavy bangs, a low hat, or hair covering the temples can make the forehead appear narrower.
Hair across the cheeks can hide the widest area. Hair across the jaw can make a structured lower face look soft. Thick glasses can cover the brow or cheekbone area. If possible, tuck hair behind the ears and remove sunglasses or heavy frames for the analysis photo.
What the photo quality check does
The photo quality check protects the report from inputs that would make the explanation look more certain than the image allows.
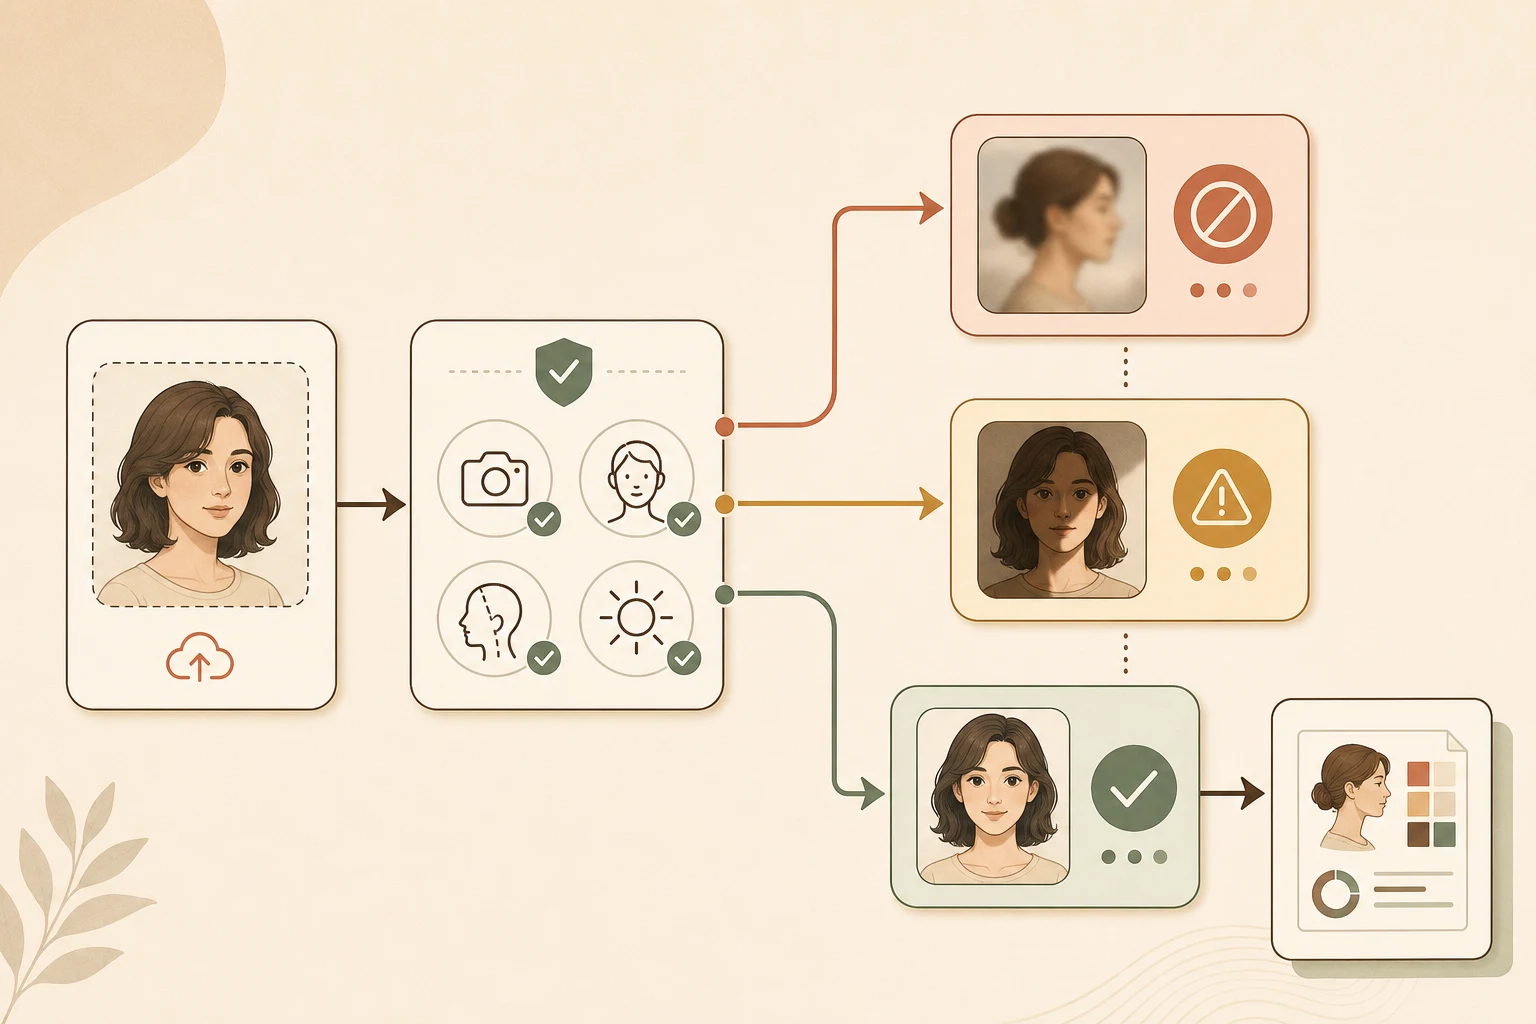
Blocked
The upload should stop when the system cannot make a responsible comparison: no face found, more than one prominent face, a side profile, severe blur, a face that is too small, or major obstruction.
Warning
A warning means the photo may still be usable, but one condition could reduce confidence in part of the explanation. Examples include mild shadow, slight head turn, partial hair coverage, strong smile, glasses covering part of the brow, or moderate compression.
Pass
A pass means the photo is front-facing, sufficiently clear, contains one usable face, and shows the important boundaries with reasonable lighting. It does not mean the result is a scientific measurement. It means the input is suitable for an interpretive style report.
When to upload again
Upload a new photo when the quality check blocks the image, the report says a key area is not visible, the result does not resemble you and the current photo uses a strong angle or filter, or two ordinary photos look very different because one input is clearly worse.
Do not upload dozens of selfies to chase a preferred label. Use one or two neutral photos and look for a stable overall pattern. The mixed-result guide explains why close results can vary slightly.
A setup you can copy
Stand facing a window or softly lit wall. Hold the phone at eye level, about an arm's length away. Use the standard camera mode without beauty filters. Keep the head upright, relax the mouth, tuck hair behind the ears, and confirm that the chin is inside the frame.
Before uploading, review the photo once at normal size. You should be able to see both cheek edges, both jaw edges, the chin, and enough upper-face boundary to compare width. If you need to zoom in heavily to find the face, the face is probably too small. If one side of the jaw disappears into shadow or hair, retake the photo before trusting a close result.
Common misconceptions
- "Portrait mode is always better." It can blur the outer jaw or hair boundary.
- "Closer is more accurate." Close lenses often create more distortion.
- "A beauty filter only changes skin." Some filters reshape jaw, cheeks, eyes, or chin.
- "Glasses never matter." Thin frames may be fine, but thick rims can cover useful areas.
- "A pass means absolute accuracy." It means the photo is usable, not exact scientific proof.
FAQ
Can I use a photo taken by someone else?
Yes. It is often easier because the camera can stay farther away. Ask the person to keep the camera at eye level and avoid portrait filters.
Can I smile?
A small natural expression is acceptable, but a wide smile can lift the cheeks and tighten the lower face. A relaxed expression gives a more neutral comparison.
What if I wear glasses every day?
Remove them for the analysis photo if possible, then use the report while trying frames. Analysis needs to see the brow, cheekbone, and outer-face relationships clearly.
Start with a photo the report can explain
Upload one clear front-facing photo. FaceFit will check the input first, then build a Personal Face Shape Style Report from the visible features it can responsibly interpret.
Want to know your face shape?
Upload a clear front-facing photo to see your closest match and the visible reasoning.
Find your face shape